Workshop records · worked example
Carry a useful offcut into the next job.
A rectangle in a cutting plan becomes reusable stock only after you choose to keep it and record the stock change. On the next job, use its actual inventory ID instead of entering another copy of the same piece.
Apple editions are being prepared. This walkthrough describes the native iPhone, iPad and Mac workflow. The example is synthetic practice input, not customer work, a measured workshop result or a promise of a particular layout.
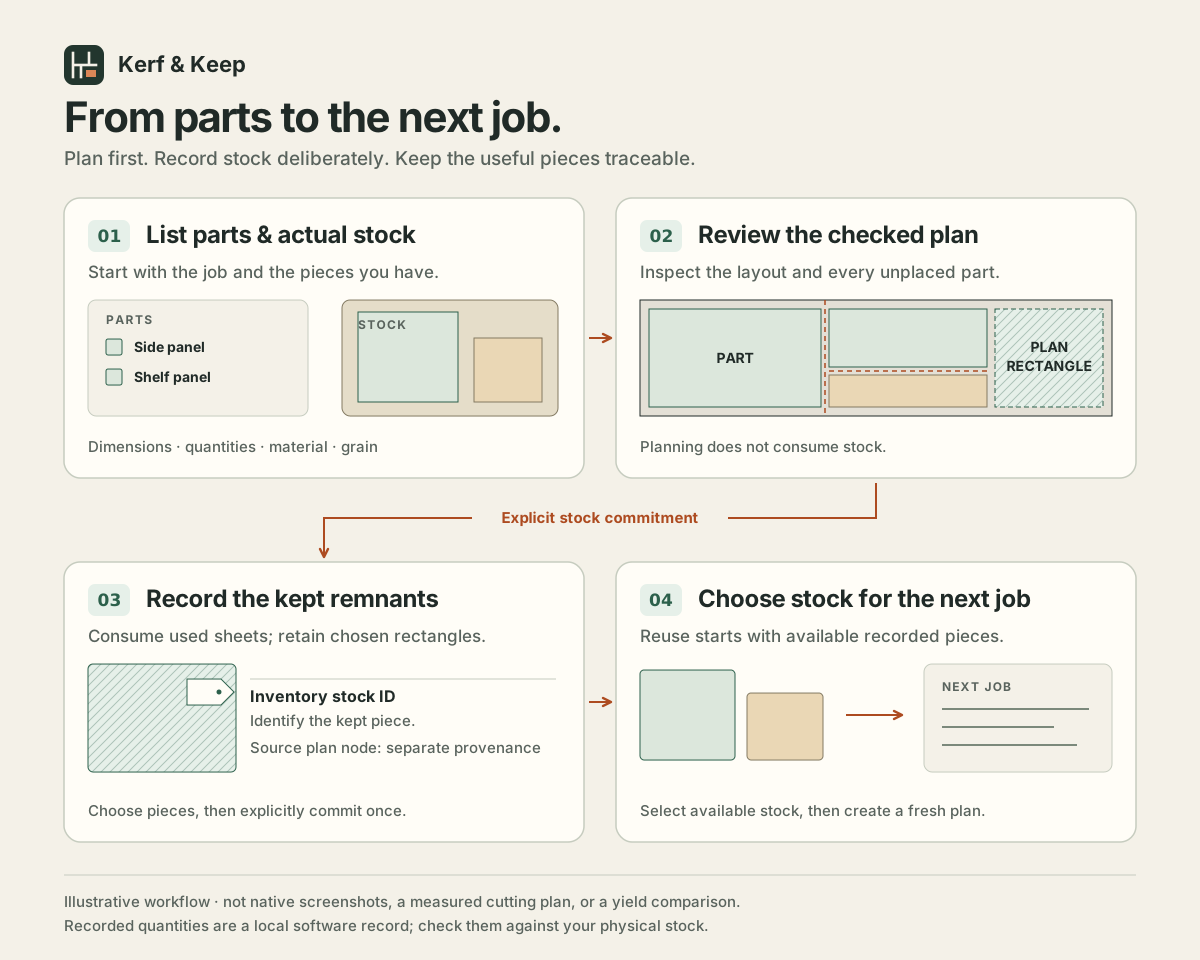
Start with three finite pieces
The bundled Mixed-material offcut reuse example has two birch-plywood offcuts and one MDF piece. There is one of each. Birch and MDF are separate material and thickness groups.
| Piece | Size, mm | Quantity | Material / thickness |
|---|---|---|---|
| Birch offcut · large | 600 × 400 | 1 | birch-plywood-18 / 18 mm |
| Birch offcut · small | 400 × 300 | 1 | birch-plywood-18 / 18 mm |
| MDF finite piece | 500 × 400 | 1 | mdf-6 / 6 mm |
| Part | Size, mm | Quantity | Material / thickness |
|---|---|---|---|
| Small panel | 395 × 295 | 2 | Birch plywood / 18 mm |
| Short divider | 195 × 95 | 2 | Birch plywood / 18 mm |
| Back insert | 240 × 390 | 2 | MDF / 6 mm |
The birch grain follows width, and its parts cannot rotate. The MDF has no declared grain and its parts may rotate. The example uses 3 mm kerf, no edge trim and a 50 × 50 mm useful-remnant minimum. Review the actual proposed rectangles; these inputs do not prescribe what the solver will leave.
From a proposal to a stock record
Keep your own work before practicing
Choose Back up workspace. Then use Workspace actions → Load worked example → Mixed-material offcut reuse and confirm Open example as separate library.
The example replaces the active project, layout and raw drafts. Its illustrative stock is not merged with your own library. Never treat the sample quantities as pieces you own.
Check the list and create the plan
Choose Edit parts & stock and compare the inputs above. Select Create cutting plan, review all source sheets and inspect every unplaced part.
A checked partial layout is still incomplete. Planning does not consume stock. If a measurement needs correction, repair it before continuing.
Choose useful rectangles deliberately
Open Review remnants & update stock. Use the Keep toggles only for qualifying rectangles you intend to retain. Their dimensions come from the actual checked plan.
A proposed rectangle has a plan-node ID. It has not yet received an inventory stock ID. If there is no useful candidate, stop the reuse exercise here; do not invent a leftover or add a duplicate stock row.
Record all represented stock use
Back up, choose Review stock commitment… and read its confirmation. Choose Commit stock & checked remnants when the record should reflect use of every source piece represented by the plan. Wait for the saved confirmation.
This applies across the plan, including sheets that are not currently on screen. It records quantities in software and does not detect physical cutting. If only part of a real job is complete, do not record all its source pieces as consumed.
Use committed stock IDs on labels
Open Workspace actions → Export & print…. Under Document, choose Committed-remnant labels, then Review available stock IDs. Select eligible available committed pieces and choose Prepare PDF.
The labels use the inventory IDs created by the actual commitment. Do not substitute a plan-node ID or an ID from this article. Reprinting creates no extra stock. A manually entered offcut is not automatically eligible for a committed-remnant label.
Select that stock for the next job
Start a new project in the same library
Back up the finished job. Choose Workspace actions → New project… → New Project. This clears the job, layout, drafts and stock selection while preserving the stock library and archived history.
Start a separate empty library… has a different purpose: it starts a blank stock record. Do not choose it when you want to reuse this library's remnants.
Find the actual available remnant
In Remnant library, use Search stock ID, label or material. Find the actual ID from the previous commitment. Check the current available quantity and, for real stock, the piece itself.
Select the available rows and choose Use selected stock for next plan… → Use selected stock. This selects a planning snapshot without consuming stock. Exhausted rows cannot supply another job.
Enter the later job and plan afresh
Enter the parts that the later job actually requires. Keep material, thickness and grain consistent with the selected stock, then create a fresh plan. Do not force new dimensions just to make an example fit.
Use selected stock keeps an existing part list but clears the current layout and all raw drafts. Starting the new project first avoids carrying the old job's required parts into this one.
Record reuse once, then export a backup
Review missing parts and explicitly commit the later job when appropriate. A consumed remnant becomes exhausted. Do not type another copy into stock to make it available again.
Use Back up workspace, or Mac File → Export Project Backup…, for an editable portable record. Save and autosave update this device's local working copy; they leave an opened backup file unchanged. Copies on different devices do not synchronize or prevent duplicate stock use.
What a useful record should tell you
- Which source pieces the recorded job used.
- Which qualifying rectangles you explicitly kept.
- The actual inventory stock ID assigned to each kept piece.
- Whether that piece is still available for a later job.
- Where the current editable backup is stored.
The aim is a consistent record of finite stock. This walkthrough does not establish a particular yield, an optimal arrangement, a time saving or a completed physical job.
Practice with the same inputs
The bundled Mixed-material offcut reuse example is the direct way to follow this article. A companion starter pack contains matching parts and stock CSVs for this job, the cabinet example and the inch-fraction example.
Practice with the synthetic starter pack. Read the practice-file guide or download the starter-pack ZIP. You can use the bundled examples in the meantime.
CSV exchanges rows, not a workspace backup. It carries no project settings, saved plan or stock history. Importing stock rows affects job inputs; it does not update library quantities automatically. Reimporting or appending the same physical pieces can double-count stock if later recorded. Practice in a separate empty library.
The companion PDF examples use a separate historical synthetic repeat-shop case. They are not solved outputs of these CSV jobs, customer work or screenshots. Review the actual plan from your own inputs; the sample PDFs do not establish its outcome.
For exact controls, see the getting-started guide. For a problem with inputs or records, use support and review the privacy information before sharing details.